Thunderbird POP Configuration
1. Open Thunderbird.
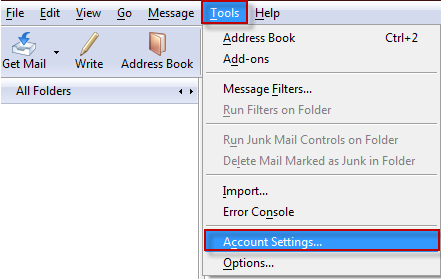
2. Click the Tools menu, and select Account Settings...
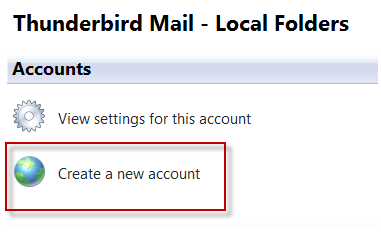
3. Click the Add Account... button to launch Account Wizard.
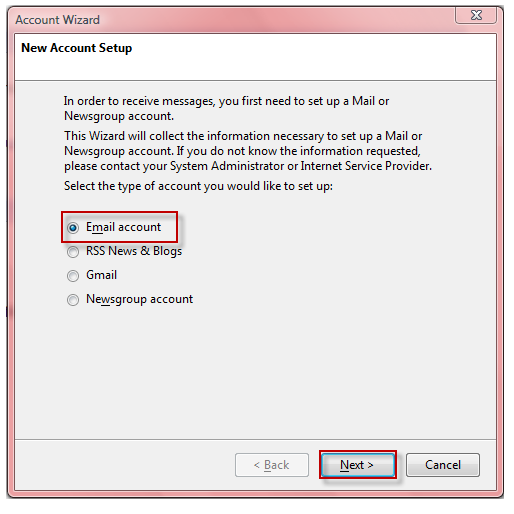
4. Select Email Account from the New Account Setup Wizard
5. Enter Identity information:
•
Your Name: Enter your name as you would like it
to appear in the From:
field of outgoing messages.
• Email Address: Enter your email address

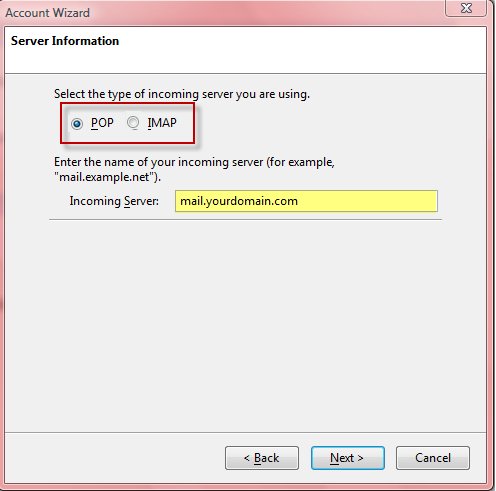
6. Select the type of incoming server as POP then:
7. Enter mail.yourdomain.com for the Incoming and Outgoing server.
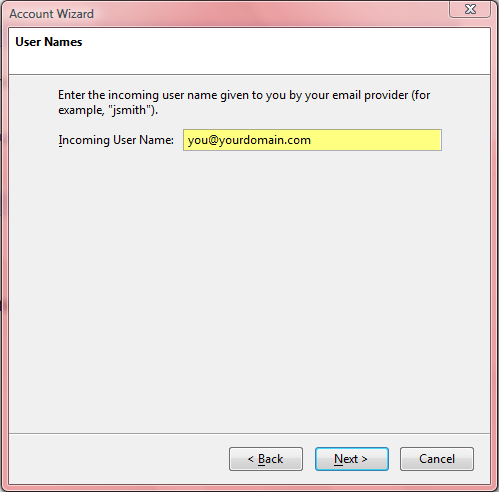
8. Enter your full email address (including @yourdomain.com) for the Incoming Username.
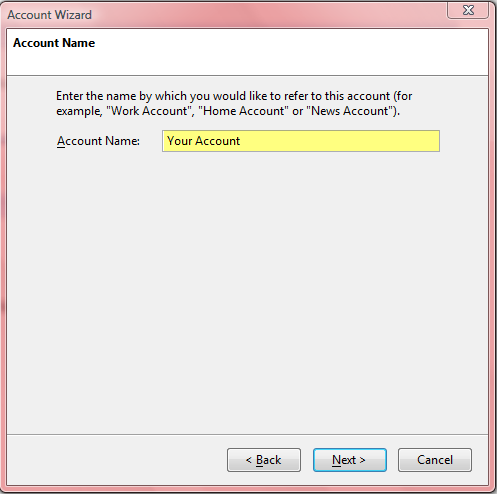
9. Enter what you prefer for your Account Name or keep the default (which is what you previously filled in for your email address). Click the Next button when you are done.
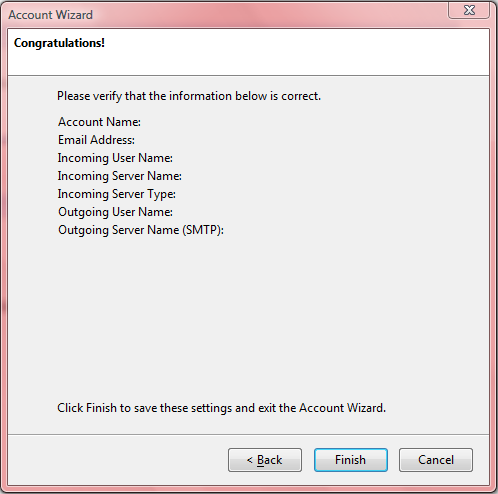
10. Finally, you will see the Congratulations window showing you what you have filled out. Please check through it to make sure you have the correct settings. Click the Finish button when you are done.
11. When the wizard closes, you may see a message window pop up asking if you want Thunderbird set as the default mail application:
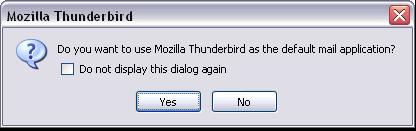
12. If you do not want to perform this check again, and then make sure you have a check next to "Do not display this dialog again".
•If you want to set it as your default, then click the Yes button.
•If you do not want it to be your default, then click the No button.
Congrats! You have now configured your email account and are ready to send/receive messages.